The laboratory is equipped with the following instruments, purchased under the LAPROMAW project:
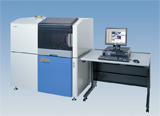
- X-Ray Fluorescence Spectrometer with wavelength dispersion – Rigaku PRIMUS II
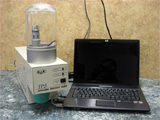
- Particle Size Laser Analyzer
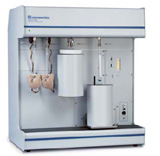
- Surface Area BET Analyzer
X-Ray Fluorescence Spectrometer with wavelength dispersion – Rigaku PRIMUS II
 XRF spectrometer with wavelength dispersion purchased from Rigaku company provides a system to analyze the surface of bulk and powder metallic, ceramics or cermetallic materials. It uses X-ray tube output of 4 kW with a beryllium window with a thickness of 30μm, which allows the analysis of a wide spectrum of elements (from boron to uranium) at low amounts, on the surface of materials with a minimum diameter of not more than 0.5 mm.
The optical system of the X-ray tube placed "on top" is particularly advantageous in the analysis of powdered samples due to the elimination of pollution of window light in case of dusting of powder samples. Primus II has a computer controlled automatic stage for investigating of 12 samples. In addition, the spectrometer is equipped with a CCD camera which allows creating 2 or 3 dimensional maps of the distribution of chemical elements for the sample with a diameter of 0.5 mm taking into account a variation of surface composition, the composition of the inclusions and heterogeneity of a material. Spectrometer PRIMUS II is characterized by high efficiency in the analysis of even the most complex laboratory samples, and his versatility is due to computer controlled positions of diaphragms and high-quality multi-layer crystals analyzing X-ray spectrum.
Particle Size Laser Analyser IPS UA form Kamika company
The particle size analyzer IPS UA is dedicated to work in the laboratory conditions to measure size distribution of particles in the air regardless of their physical and chemical properties. It can analyze:
- size of moist and coagulating particles from 0.5 to 1000 μm;
- size of non-coagulating particles from 2 to 2000 μm to estimate a second mean particle size and particle shape coefficient. Surface area of the investigated material can also be evaluated (when the grains porosity is known).
THE MEASURING METHOD:
 The analyzed powder is placed in the ultrasonic feeder, where the bottom vibrates with the frequency of 40 kHz and the amplitude up to few meters. If the substance contains moisture measured during vibration, it dries out, so that even high moisture content in the sample does not interfere with measurements. To allow optimum dosage of the various powders the control system of the amplitude and the number of ultrasound pulses has about 4000 transient states between zero and the maximum excitation of the feeder.
The excited particles are „sucked” by the compressor and transported to the measuring zone. The rate of air flow is controlled at 300 levels. Precision of the analyzer allows to measure singular particles and to avoid double analysis of the same particle.
In the measuring area particles go trough the beam of IR radiation. Disturbed by a particle beam of light is focused by an optical system on the photodiode, where the information is converted into the electric signal. The particle size is correlated with the electric signal. The collection of the particles is initially divided into 4096 dimensional classes and then is transformed into 256 dimensional classes available for the user.
The measured signals are sent to the computer where they are recorded and processed. In addition to the measurement program the optimization program of any parameter in the function of the tested powder granulation is available and the program that converts the granulation in any calibration (sieve, spherical, aerometric). The results are presented in graphs and tables.
CHARACTERISTICS:
- Measurement range 0.5 – 2.000 μm
- Light source – Infrared diode
- Power supply 230 V AC, 50 Hz
- Working temperature from 278 to 313 K
ASAPTM 2020 BET ANALYZER – surface area and porosity analysis system
 ASAPTM 2020 BET analyzer purchased from Micromeritics provides a system for precise measurements of surface area and porosity of various materials like: carbon, active carbons, metals, metallic powders, cermetals, ceramics including molecular sieves, catalysts and their supports, soot, ashes, pigments, soils and rocks etc.
Analyzed sample can be a solid, powder, or granulate. The device is equipped with six gas inlets of analytical gas and 1000-mm Hg connection to the analysis of a wide range of samples together with a number of options for measuring the surface area (0.01 - <3000 m 2 / g) and pore size (2 - 500 nm). ASAPTM 2020 has two independent vacuum systems which allow simultaneous preparation of two samples and analysis of subsequent sample without delay, pertinent to the analyzers with a single vacuum system, which must share the pump. Long periodic Dewar in connection with patented by Micromeritics isothermal coats can keep the device for 72 hours under conditions of constant temperature and without necessity of dispensing or refilling of nitrogen during the analysis
The instrument is equipped with software allowing to analyze:
- surface area by BET method – one point and multi-point (without number of points limit).
- surface area by Langmuir method
- Temkin and Freudlich isotherms
- pores volume and pores area distribution in the range of mesopores and micropores with BJH method
- micropores distribution by MP method and total micropores volume with t-graph and s-graph methods
- heat of adsorption


